This article describes how to use SIKU to display measurements taken with a Castaway CTD device.
Part 1: Making the SIKU Post
- Perform the cast with your Castaway device.
(For detailed instructions on using a Castaway device , please refer to the user manual: https://www.fondriest.com/pdf/ysi_castaway_manual.pdf )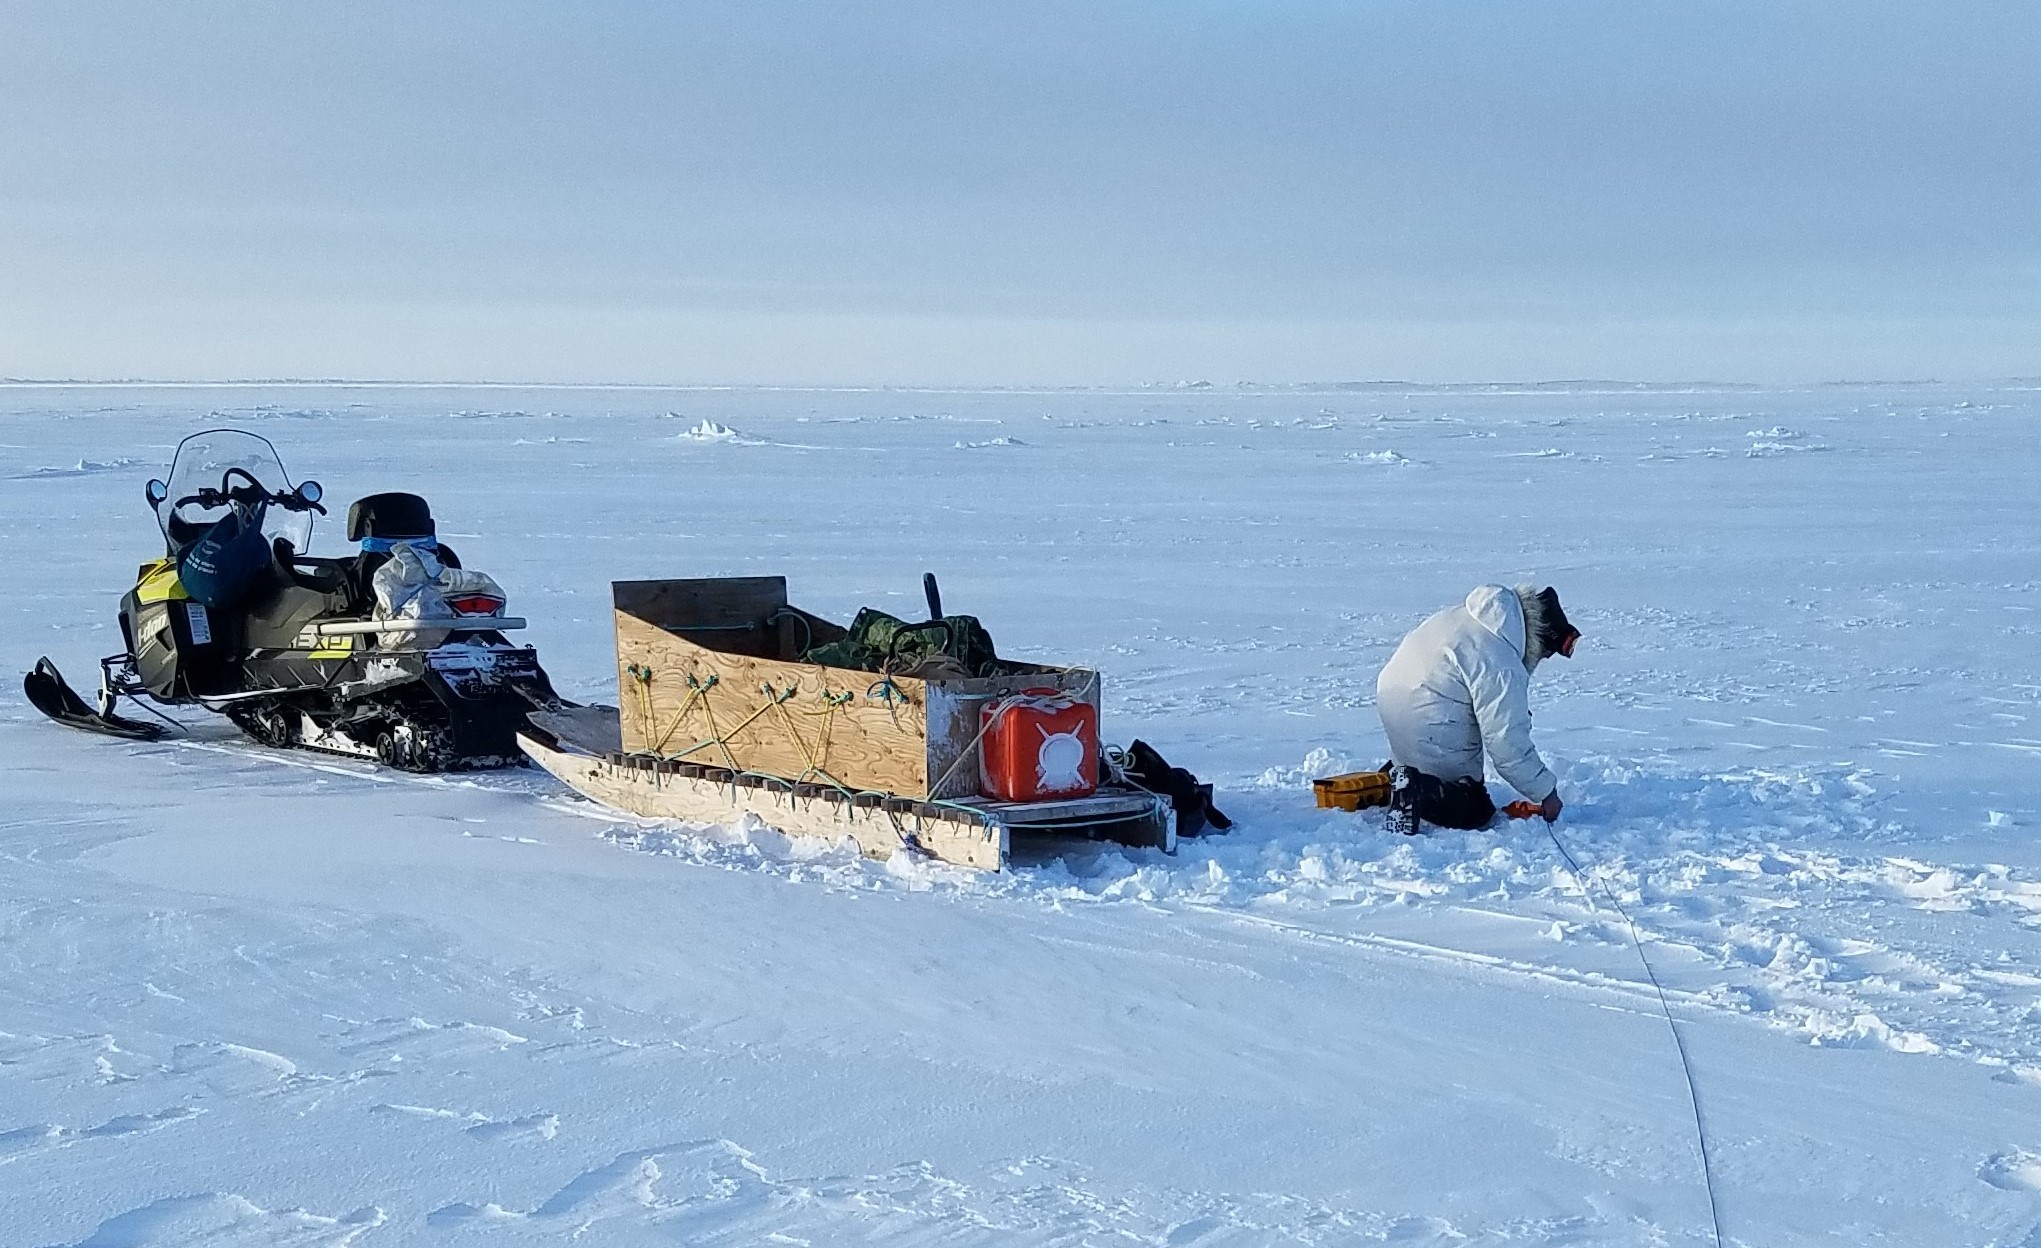
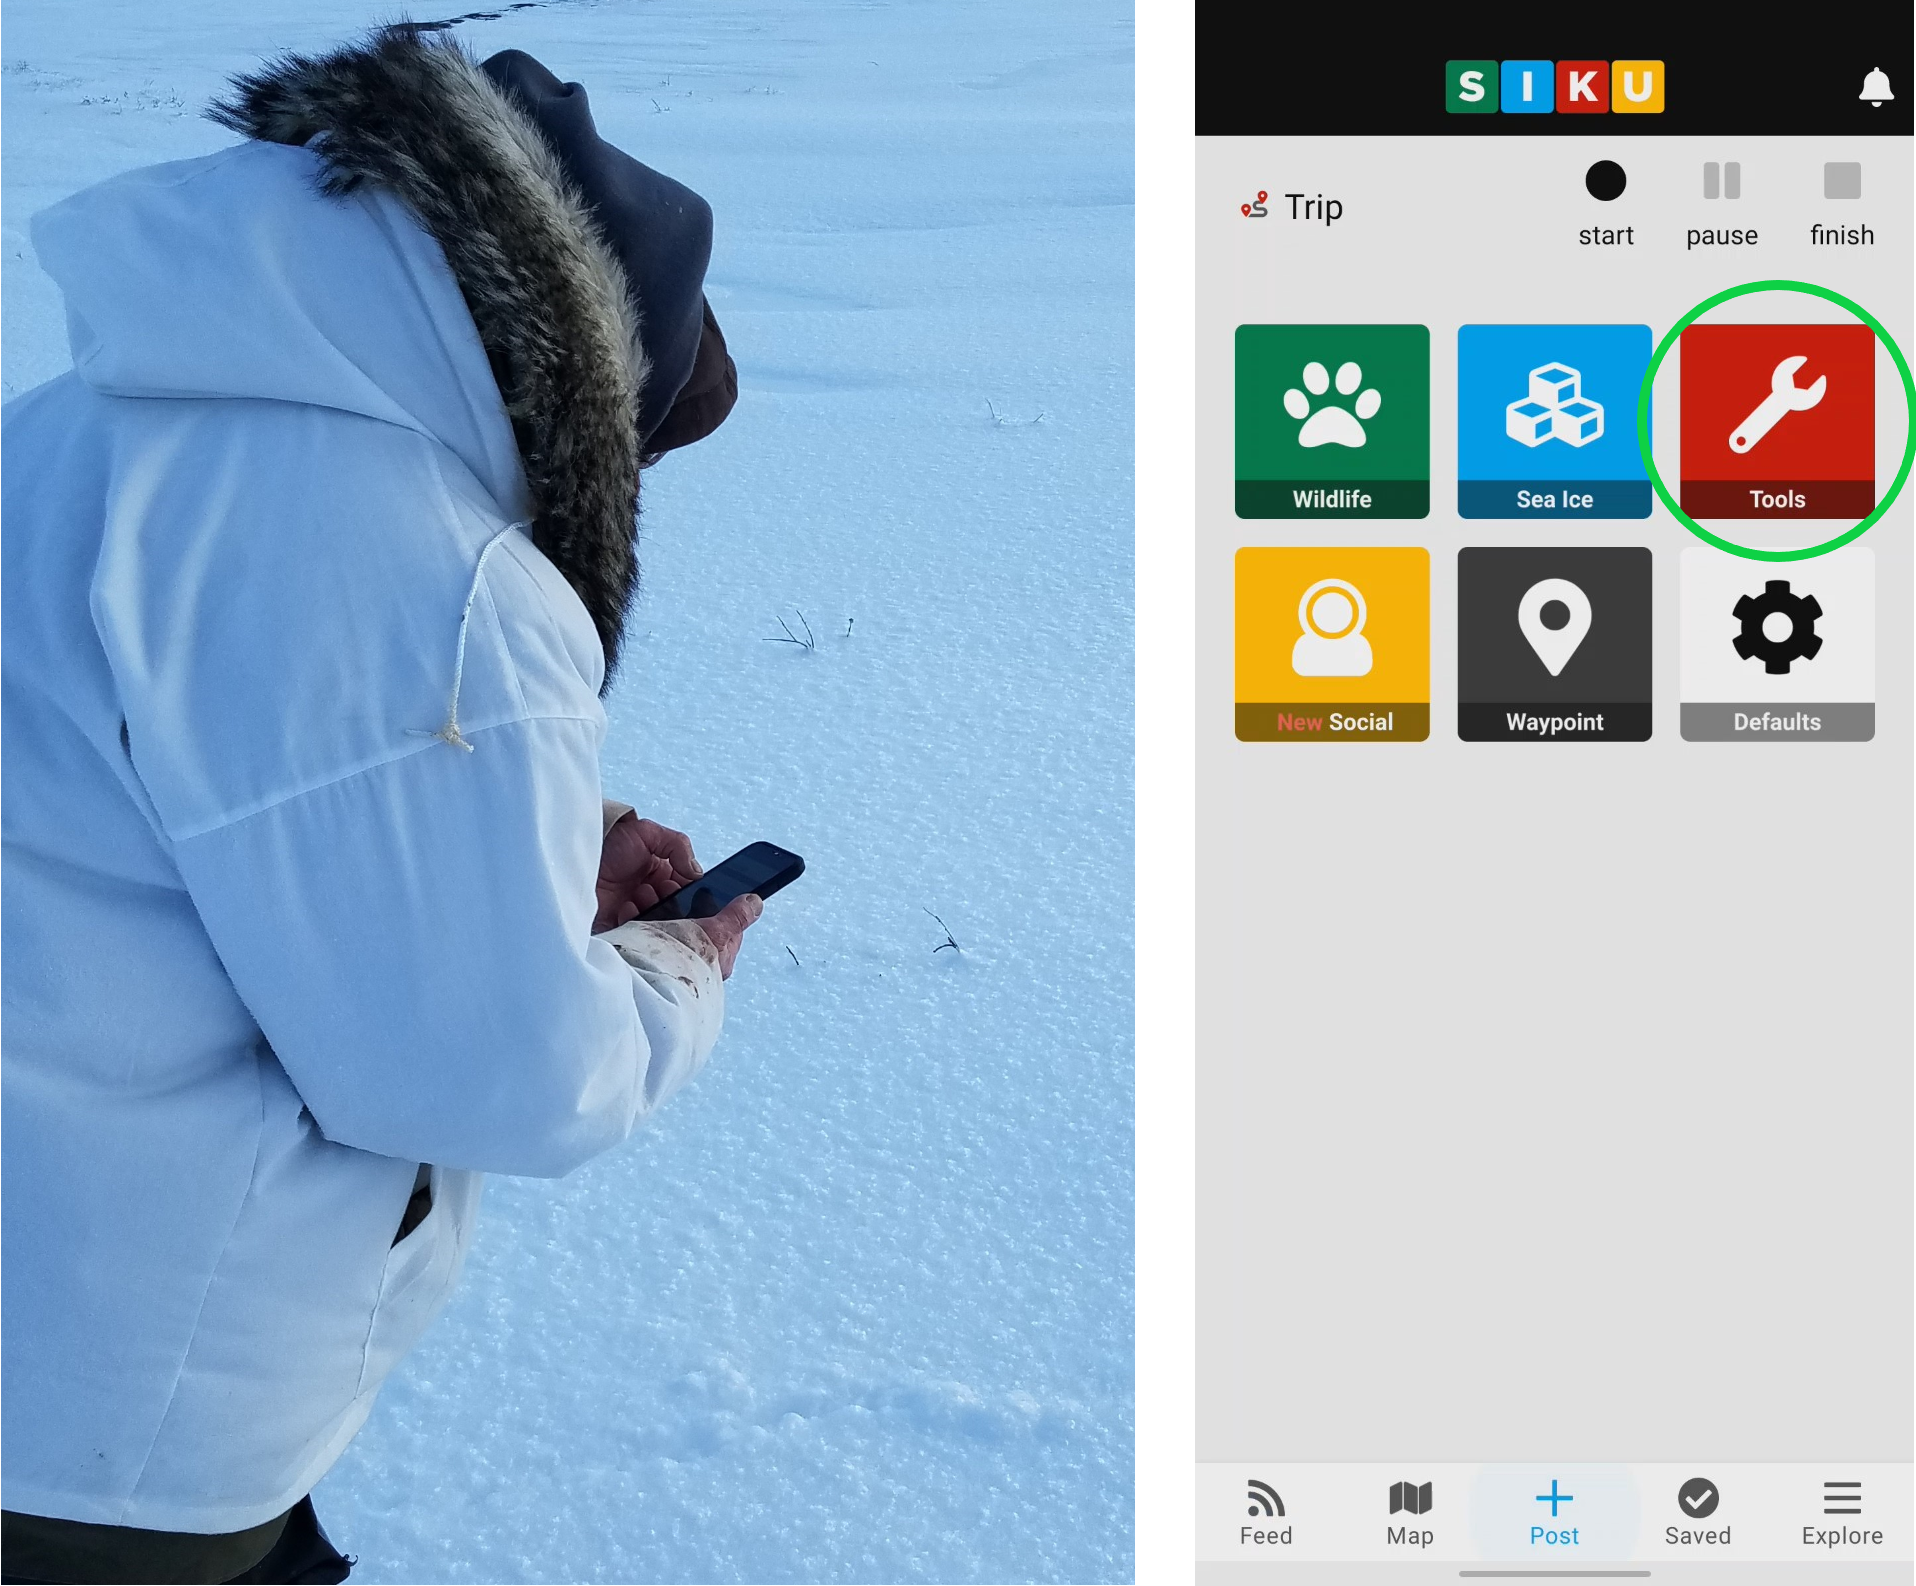
- When the cast is complete, open the SIKU app on your mobile device. Select the Tools icon.
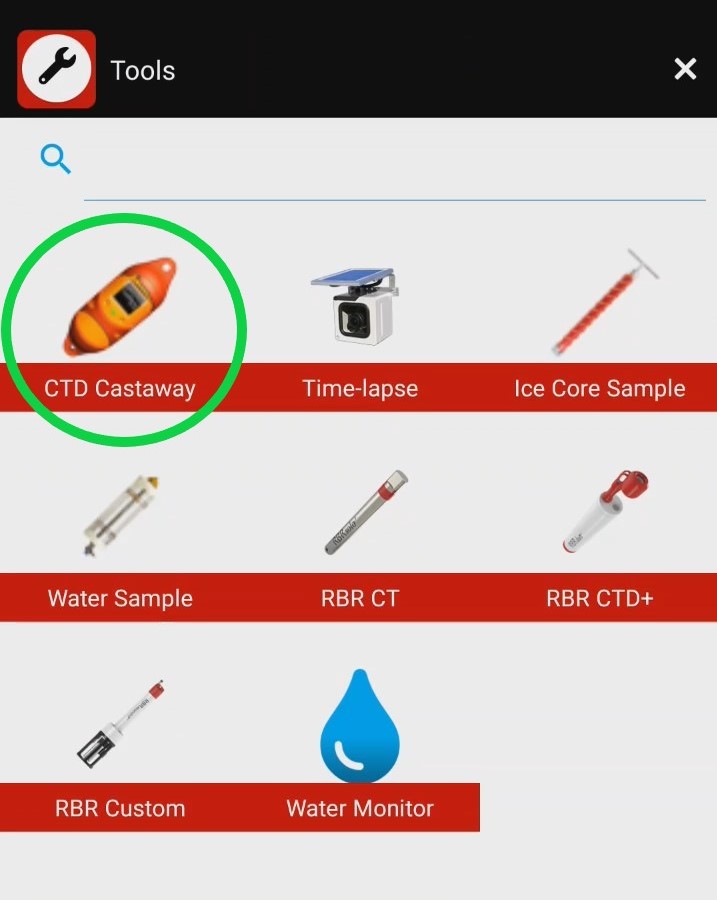
- Select CTD Castaway from the list of tools.
- Select Set Location and time to open it. The current time and location will be automatically entered using your mobile device’s built-in clock and GPS. This will work even if you aren’t connected to a network.

- Select Photos & description to open it. Enter the Featured Post Name (ex. “CTD Cast”).
Enter a picture by selecting the Featured Photo camera icon. Select Camera if you want to take a picture now, or select Gallery if you want to use a picture that you’ve already taken.
Enter the Featured Post Text (ex. “CTD measurement taken in the bay”).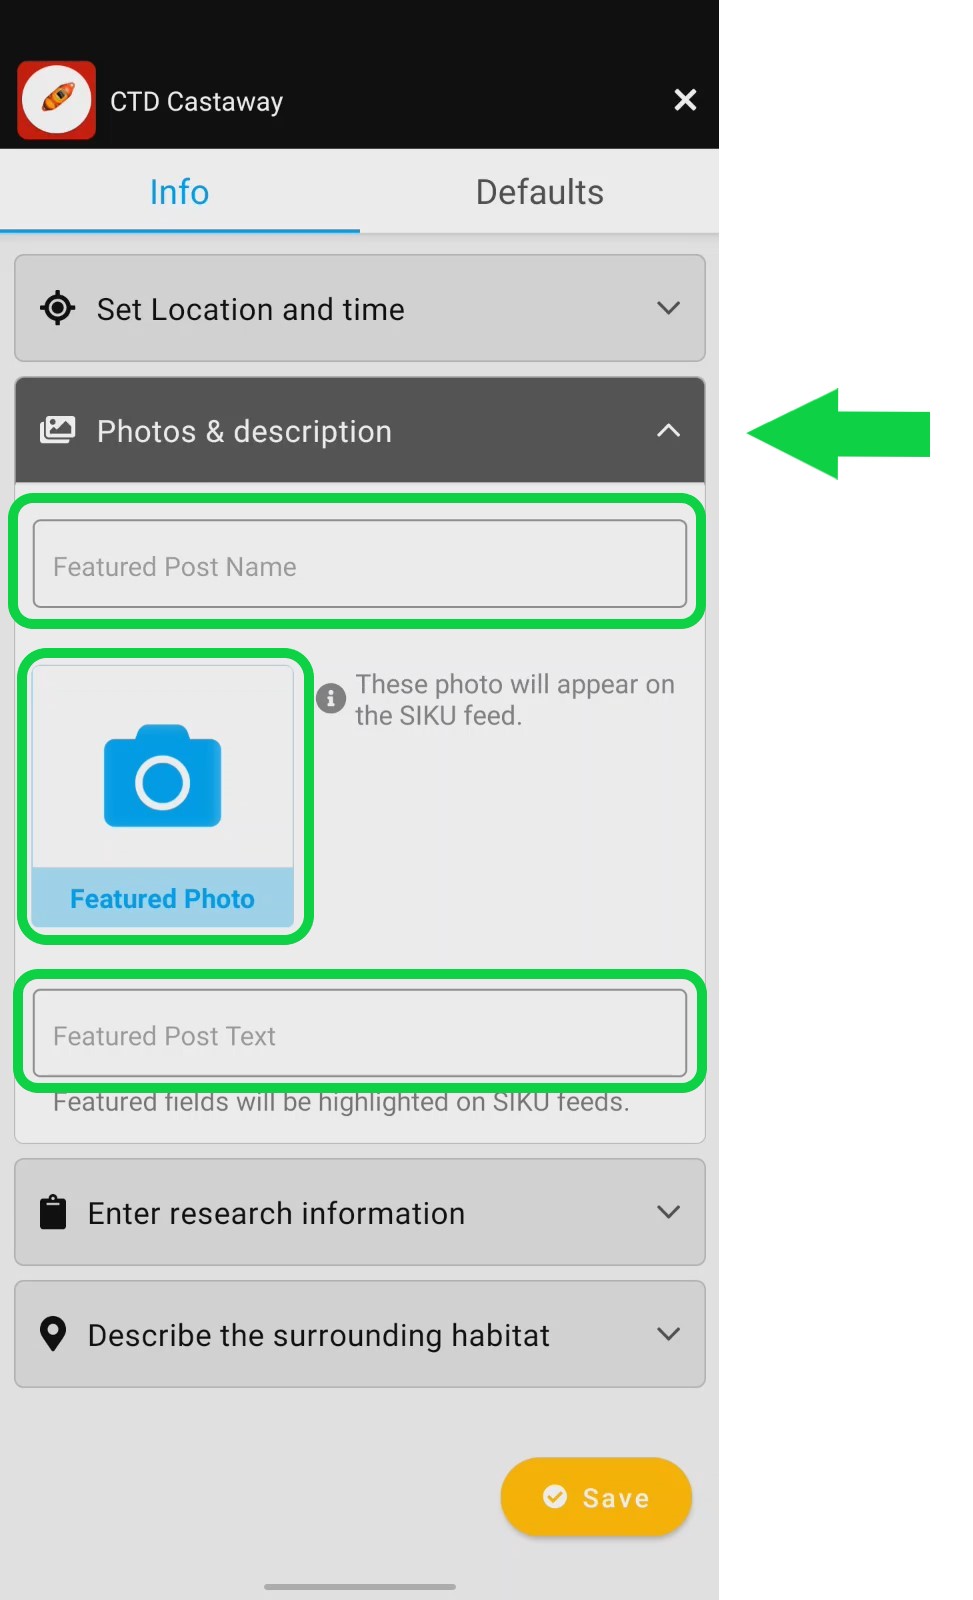
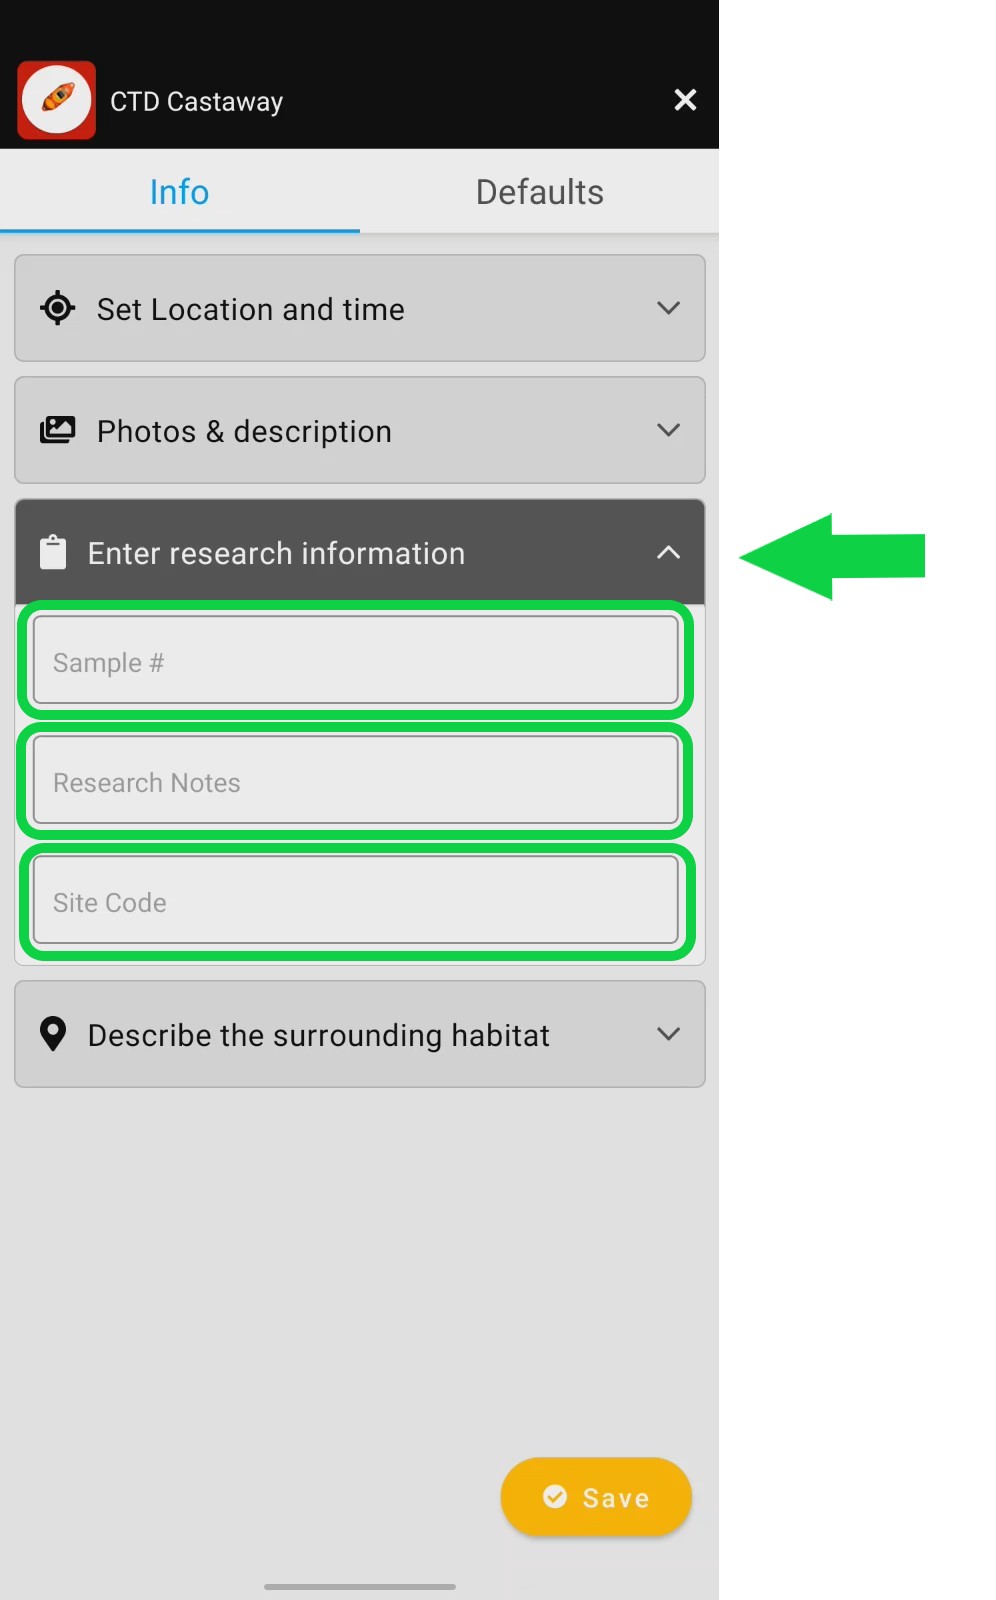
- Select Enter research information and add any information required for your project.
- Select Describe the surrounding habitat to open it.
Enter a Habitat Photo.
If there is sea ice nearby, select Tag Sea Ice Features and show what kind of ice it is.
Enter any details about the surrounding area in Habitat Notes.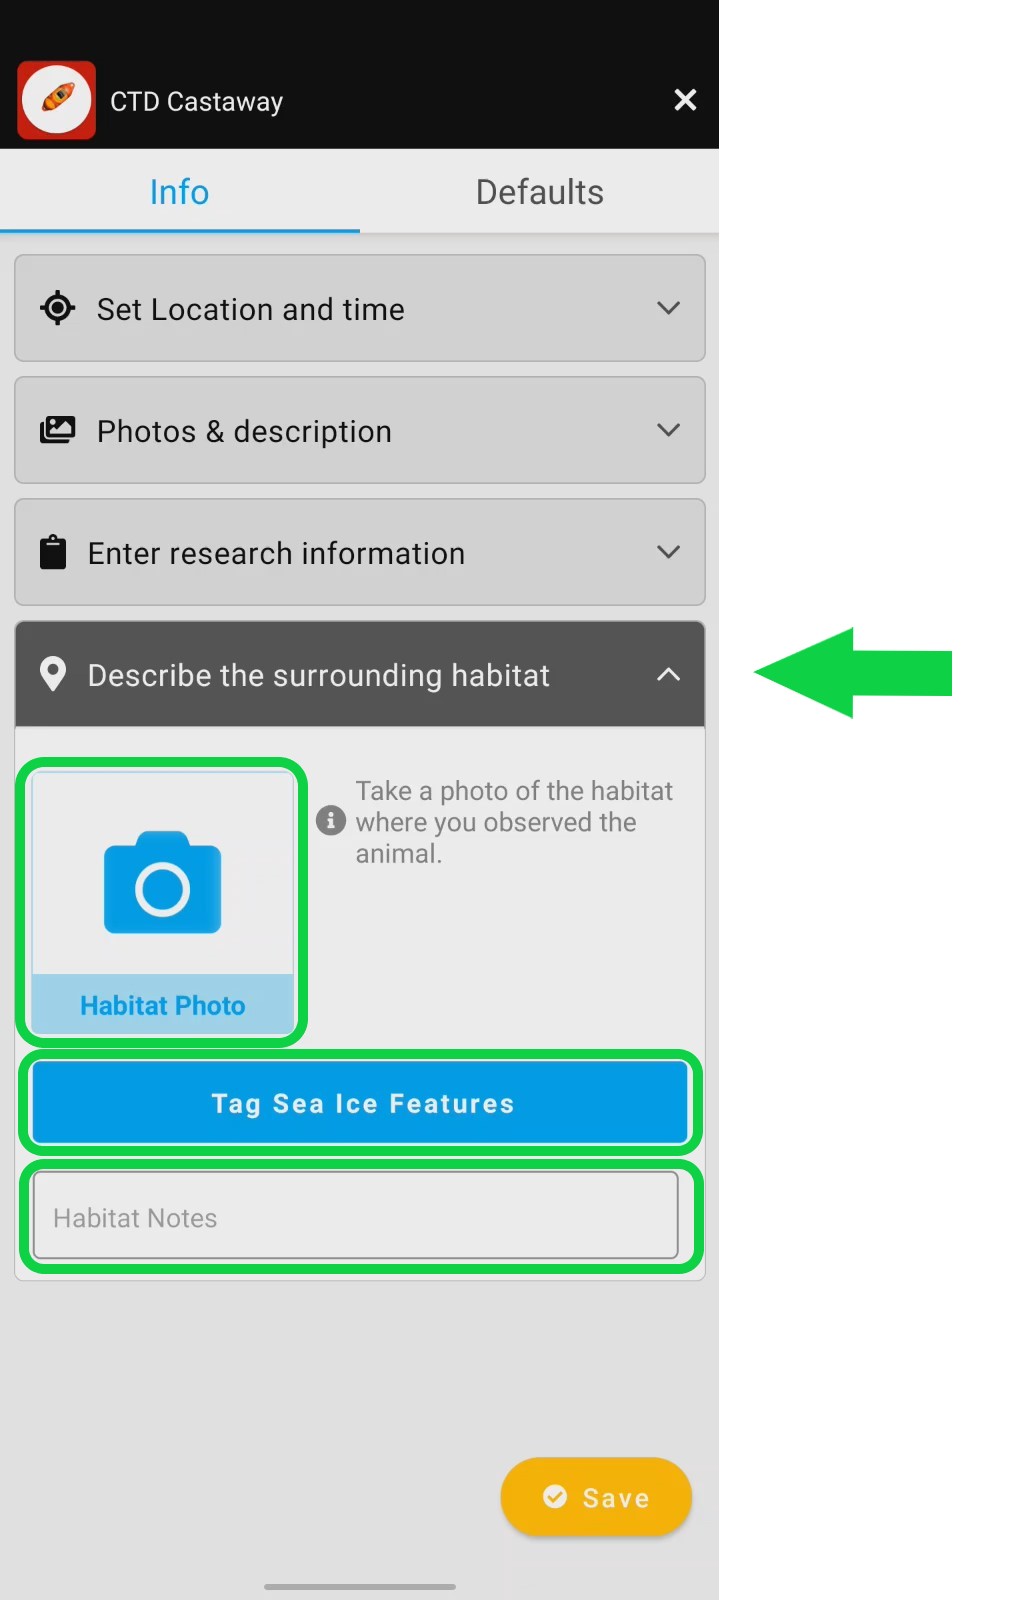
- Select the Defaults tab and enter any missing information. If you have previously set your default information in your profile then it should automatically appear. You can also change the stewardship & privacy settings for this post.
⭐Important Note: If you are making this post for a project, remember to tag the project in your defaults. This gives the project permission to use the data from your post.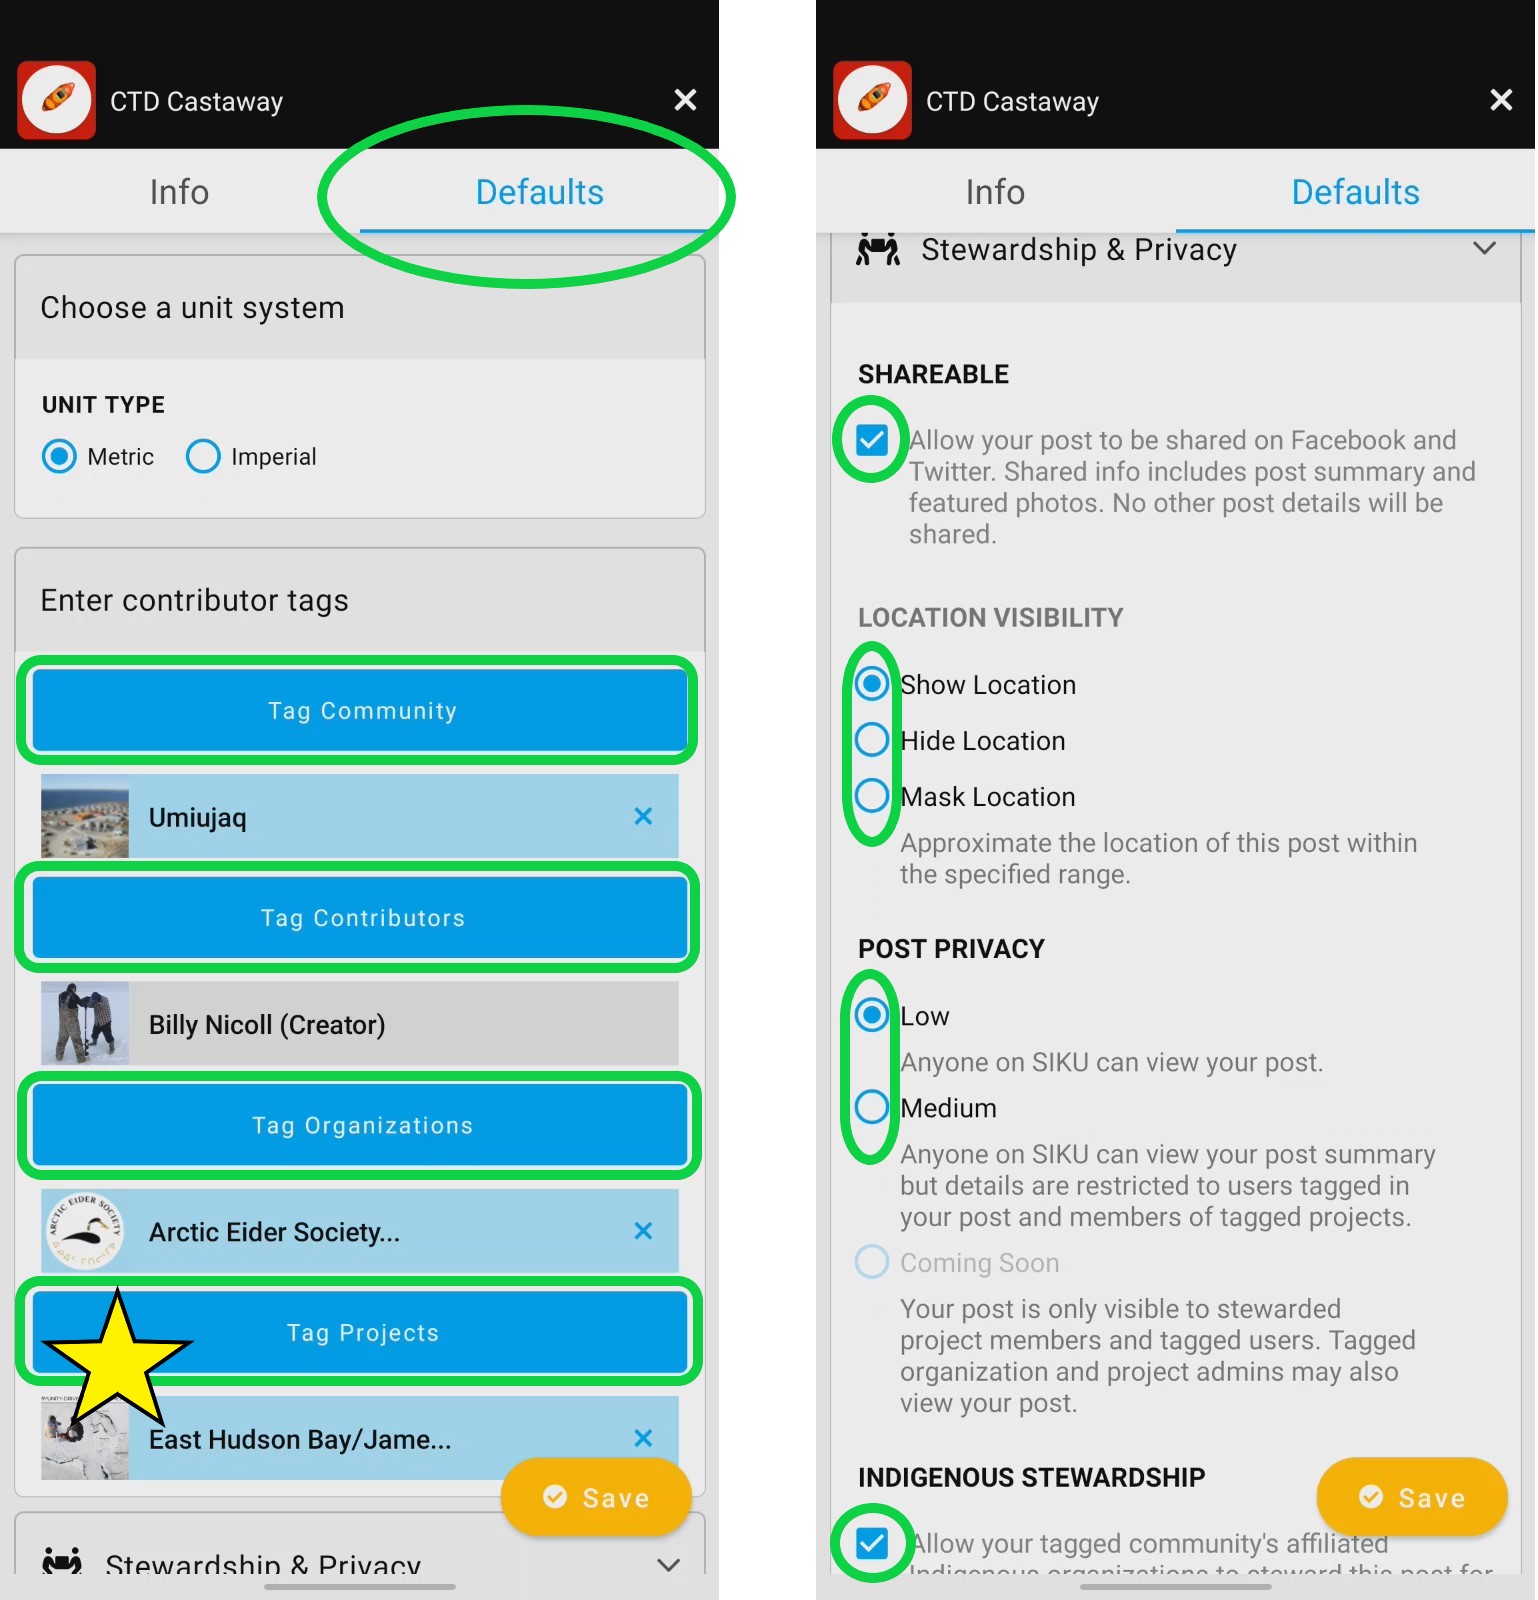
- When you return to town, connect to the internet.
Select ✔Saved at the bottom of the screen.
Under the Pending tab find the CTD CastAway post and select the cloud icon to next to it. This will upload the post to the internet.
If the upload worked, the post will show up in the Uploaded tab.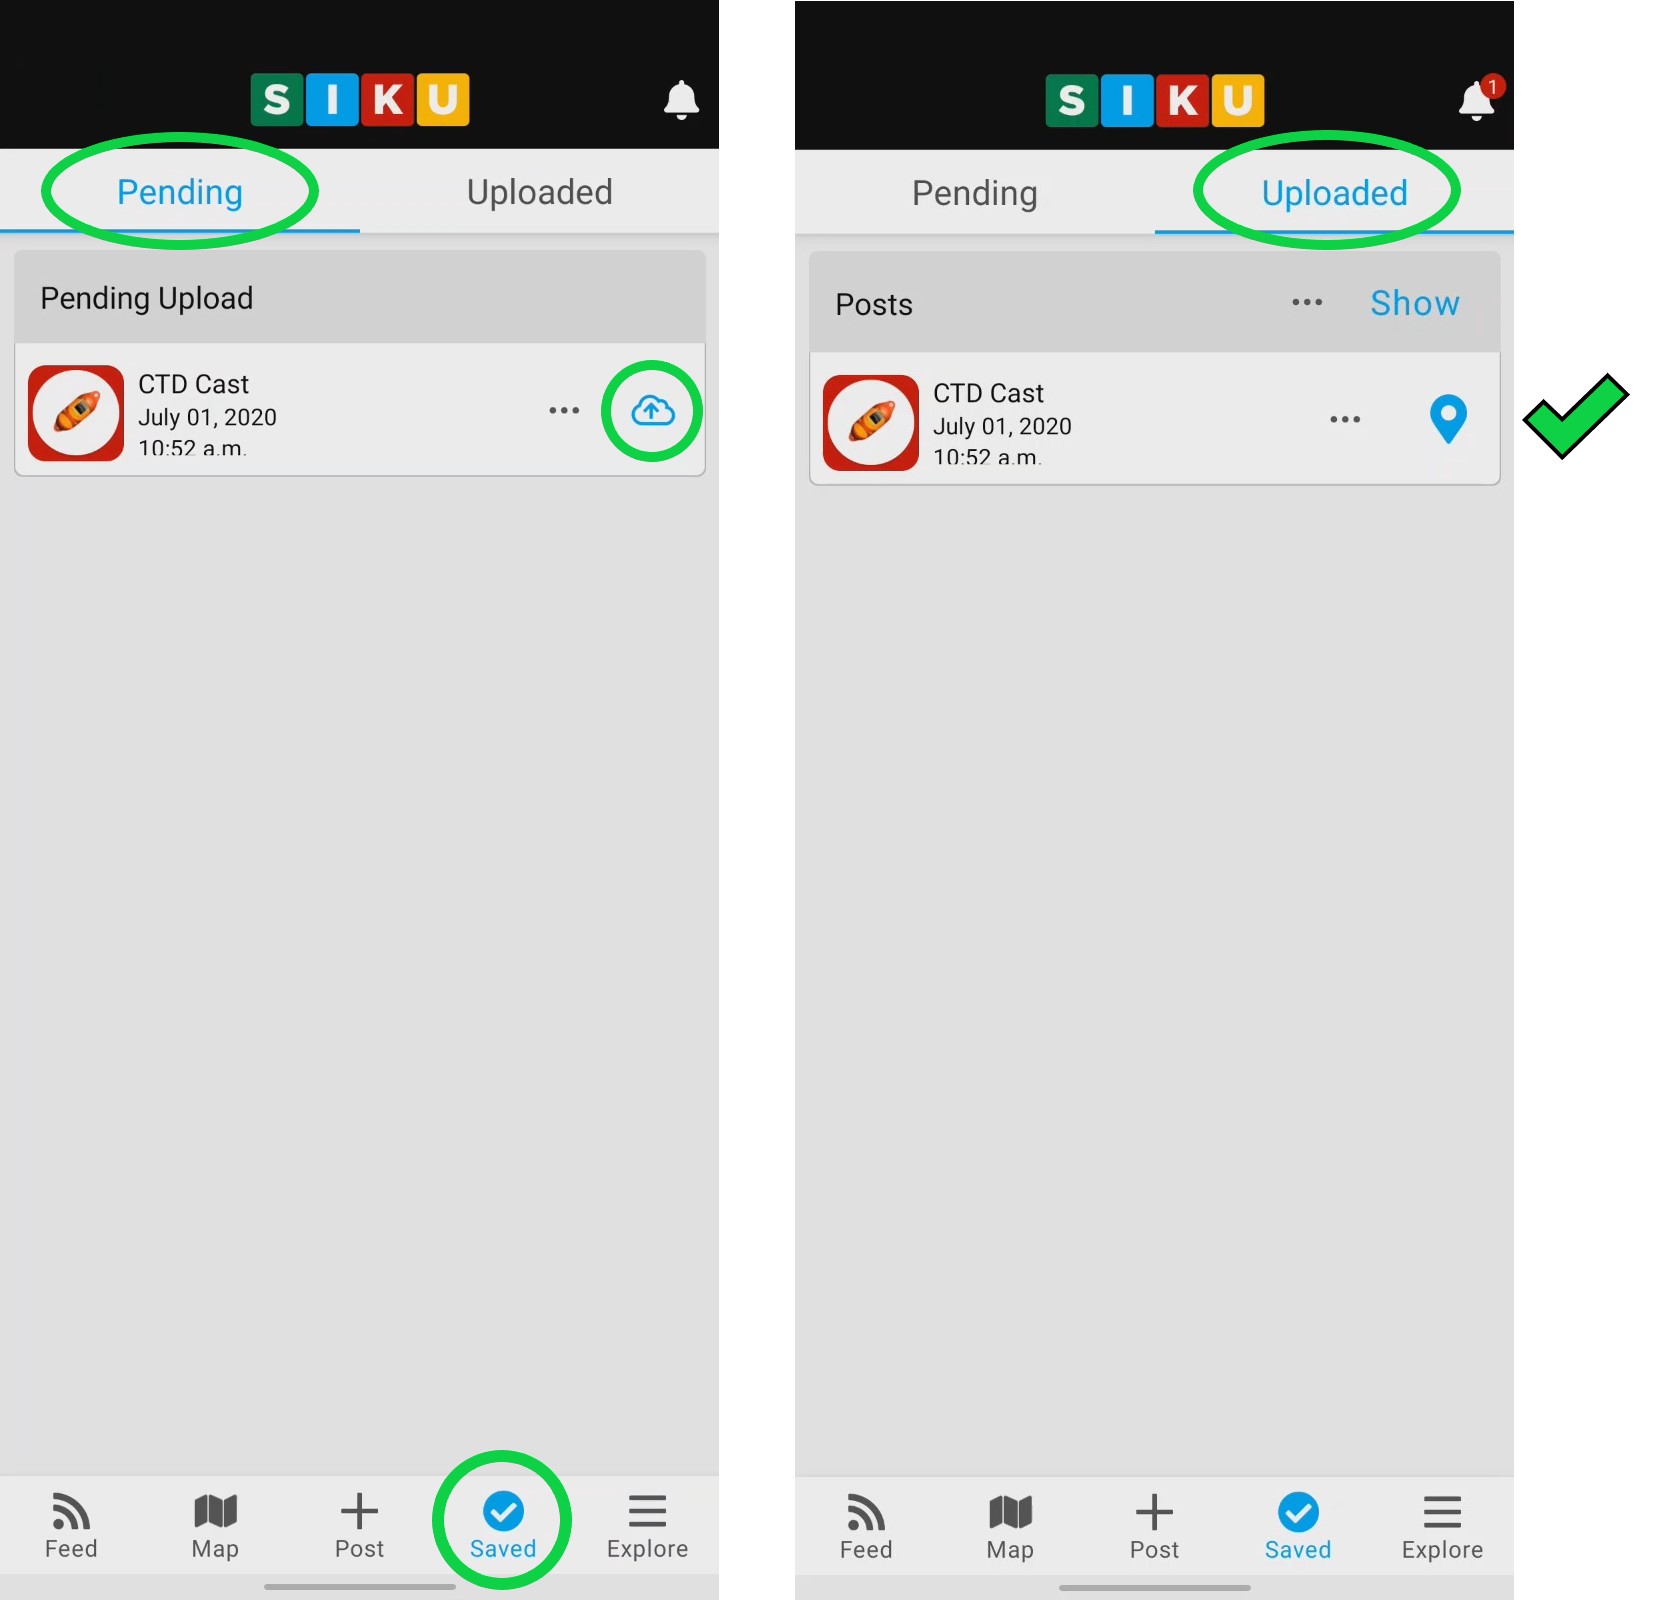
Your CTD CastAway post is now uploaded to the internet and can be viewed in the SIKU feed on any device. That being said, the post is not quite complete! The data from the CTD device still needs to be added to the post to make it useful for your research project.
The following sections will show you how to download the data from your CTD device and then add this data to your post.
Part 2: Downloading the CTD data
This section describes how to take the data from your CastAway device and put it on your computer. This will then allow you to add the CTD data to your post on SIKU. The following steps requires a computer with CastAway-CTD software downloaded on it. If you do not have this software, it can be downloaded here: https://www.sontek.com/softwaredetail.php?CastAway-CTD-Software-Offline-Map-Add-on-1
- Turn on your computer and connect the USB Bluetooth adapter that comes with the CastAway device.
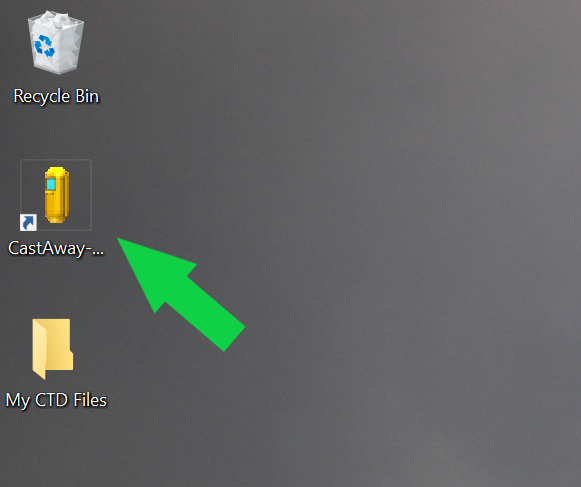
(If you do not have the USB Bluetooth adapter, make sure the computer’s Bluetooth settings are turned on and set to discovervable.) - Open the CastAway-CTD software.
- *Note: If you have already set up your device, you do not need to do this step*
Go to the Devices Tab and select Add Device.
Find the serial number on the back of the CastAway device. Enter this number into the box labelled Serial Number and select Add device. Your device should now show up in the list of devices.
- Turn on the CastAway device and keep it close to your computer. The device will automatically send data from your recent samples to your computer.
The bluetooth symbol at the top of the CastAway’s screen will turn blue while the files are being transferred and then turn back to grey when the transfer is finished.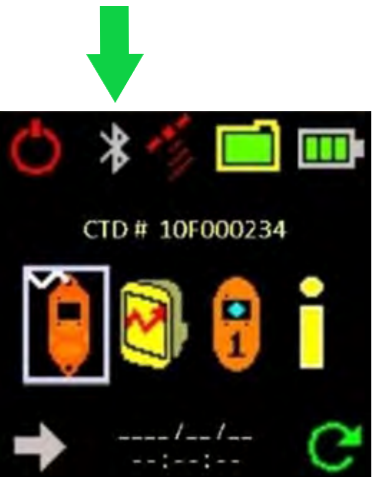
(If you are having trouble connecting, see section 6.6.2 of the Castaway User Manual: https://www.fondriest.com/pdf/ysi_castaway_manual.pdf ) - Under the Data tab, select Show Files. Select the file for the cast that you made.
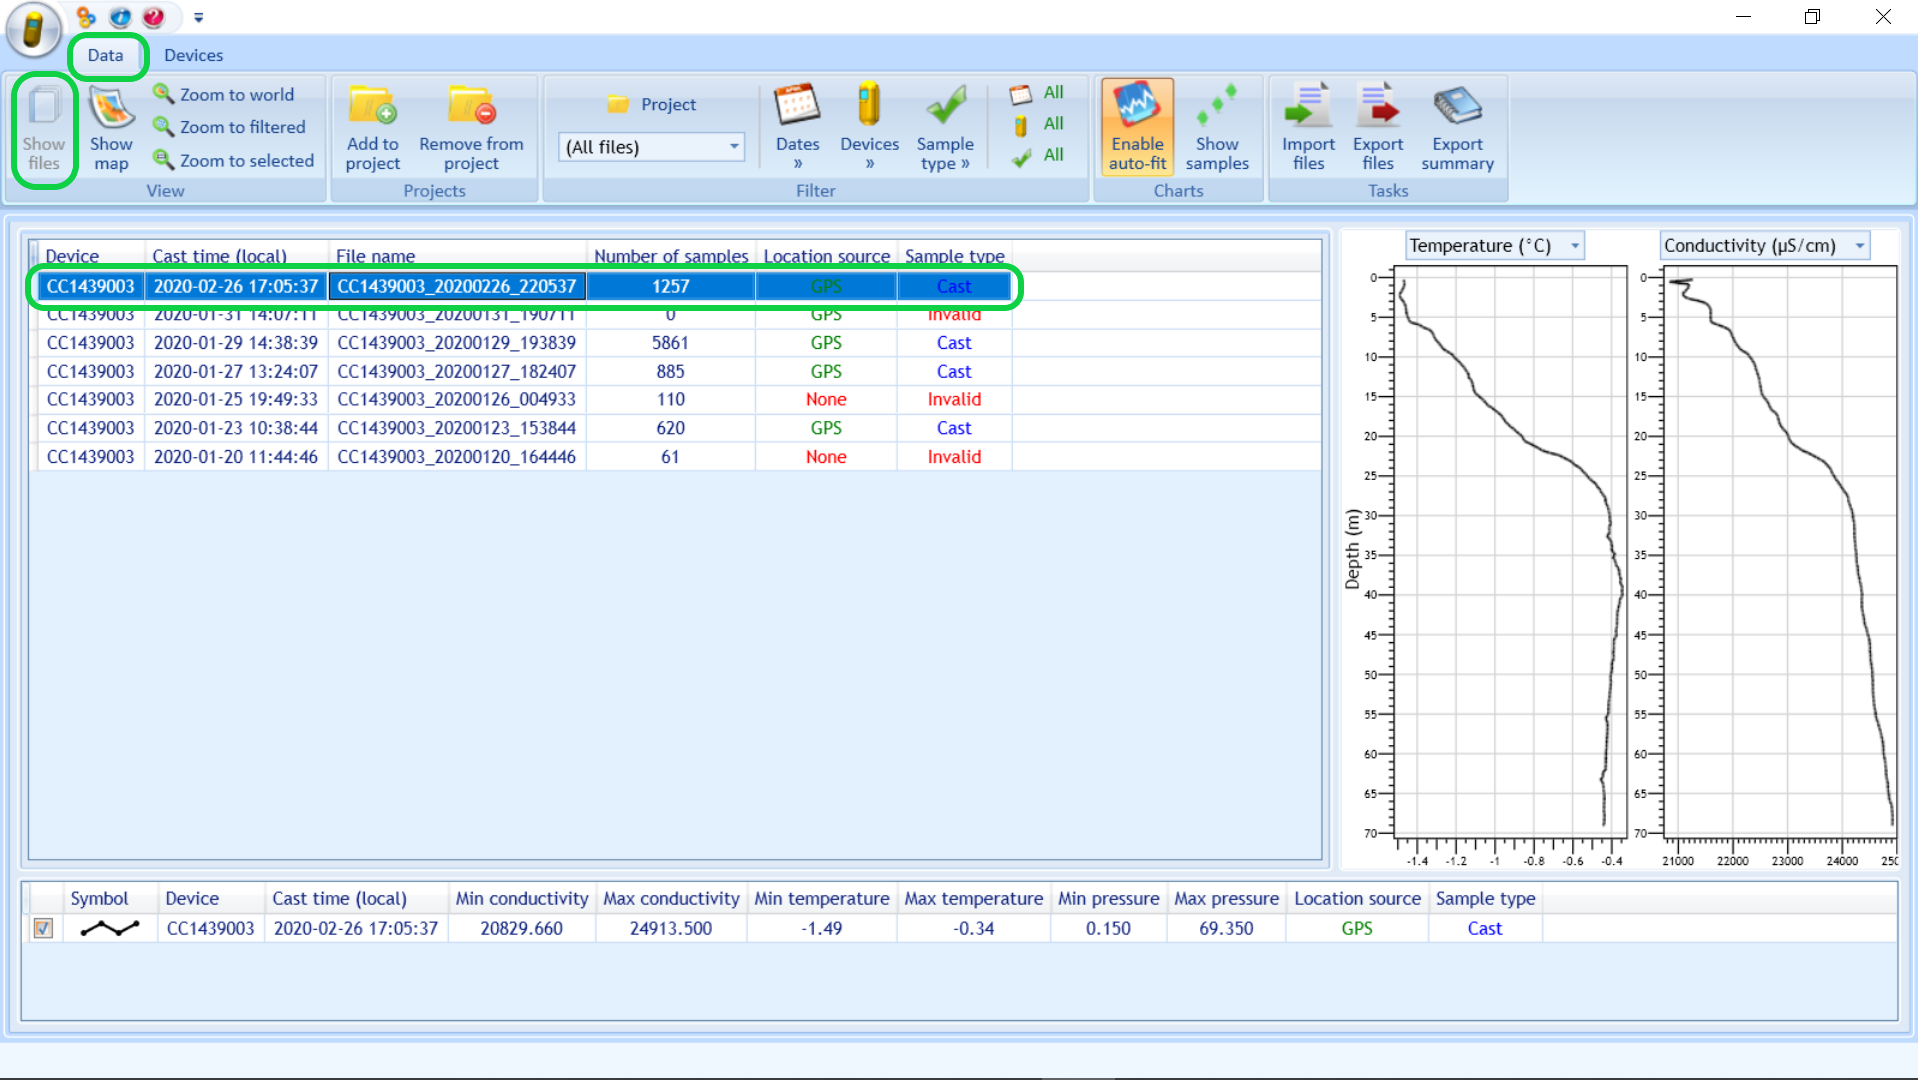
(If you are unsure which file is the right one, look at the date and time on the file. You can also select a file from the list and select Show Map to see where it was taken.) - Select Export Files. A pop-up window will appear.
Under Format choose CastawayTM Raw. Leave everything else the same.
Select Export and save the file in a place that you will remember.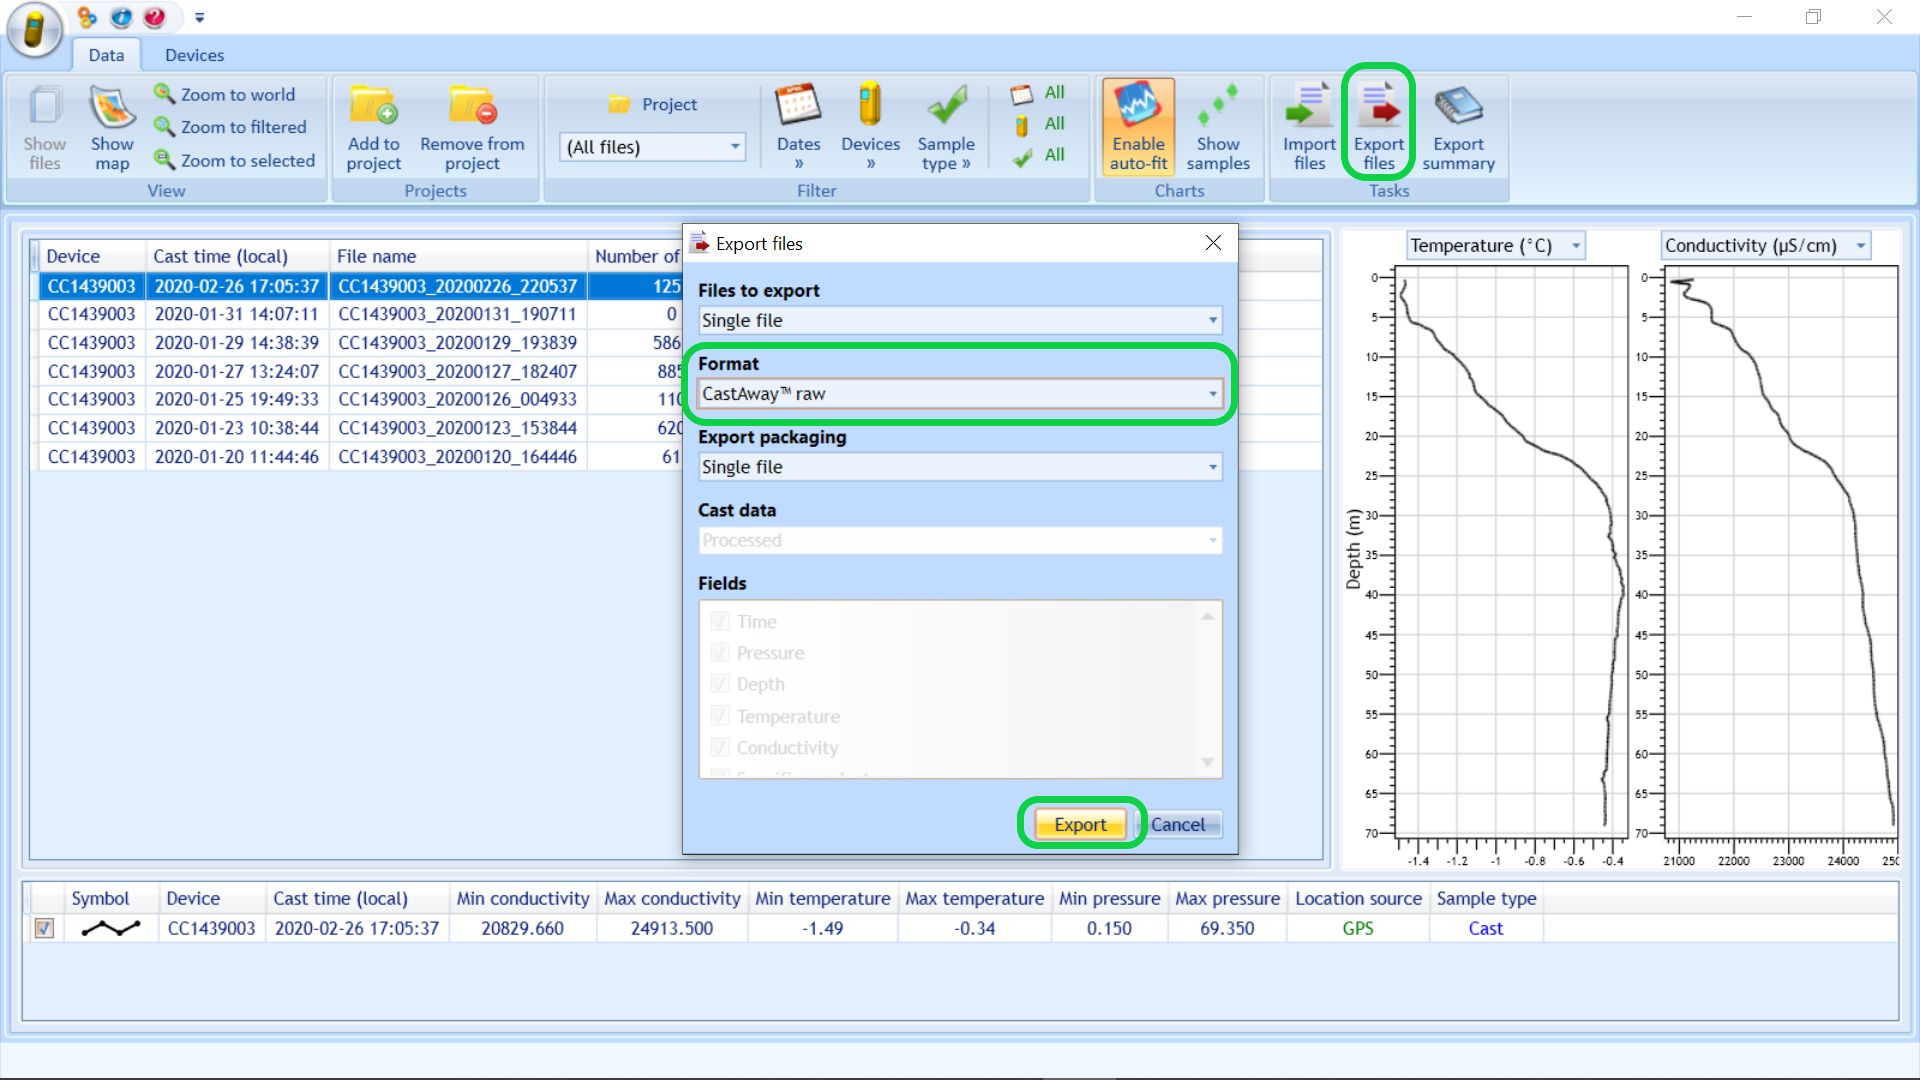
- Select Export Files again. The pop-up window will appear again.
This time, under Format choose CSV (comma separated values) + INFOHEADER
Select Export. Save the file in the same place.
Part 3: Adding the CTD Data to your SIKU Post
This section describes how to edit your CTD Castaway post to include the data from your cast.
NOTE: Some projects are set up so that the person making the CTD cast sends the Castaway files to a project administrator, who then uploads the data to the SIKU post. If your project is set up in this way, email the CTD files to your administrator. They will then follow the steps in this section.
- Open SIKU.org on your computer (not your phone). Log into your account.
- Find the CTD Castaway post that was made during the cast. Select the Edit Post button found at the bottom of the post.
(If you are a project administrator, find the post by going to the project and selecting Manage Posts)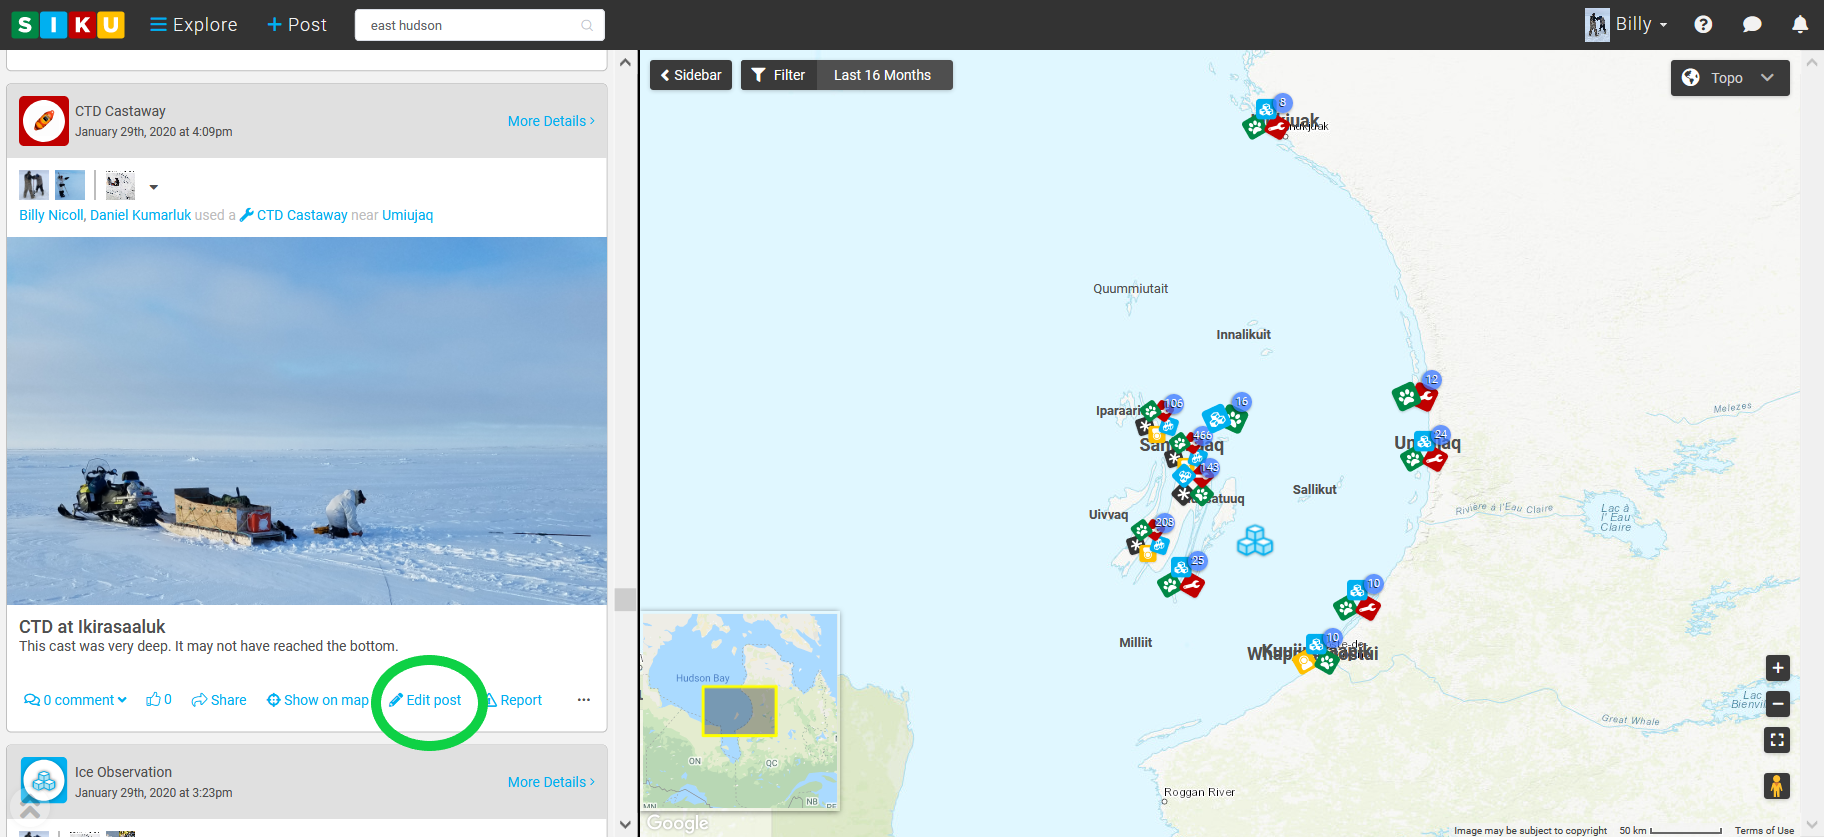
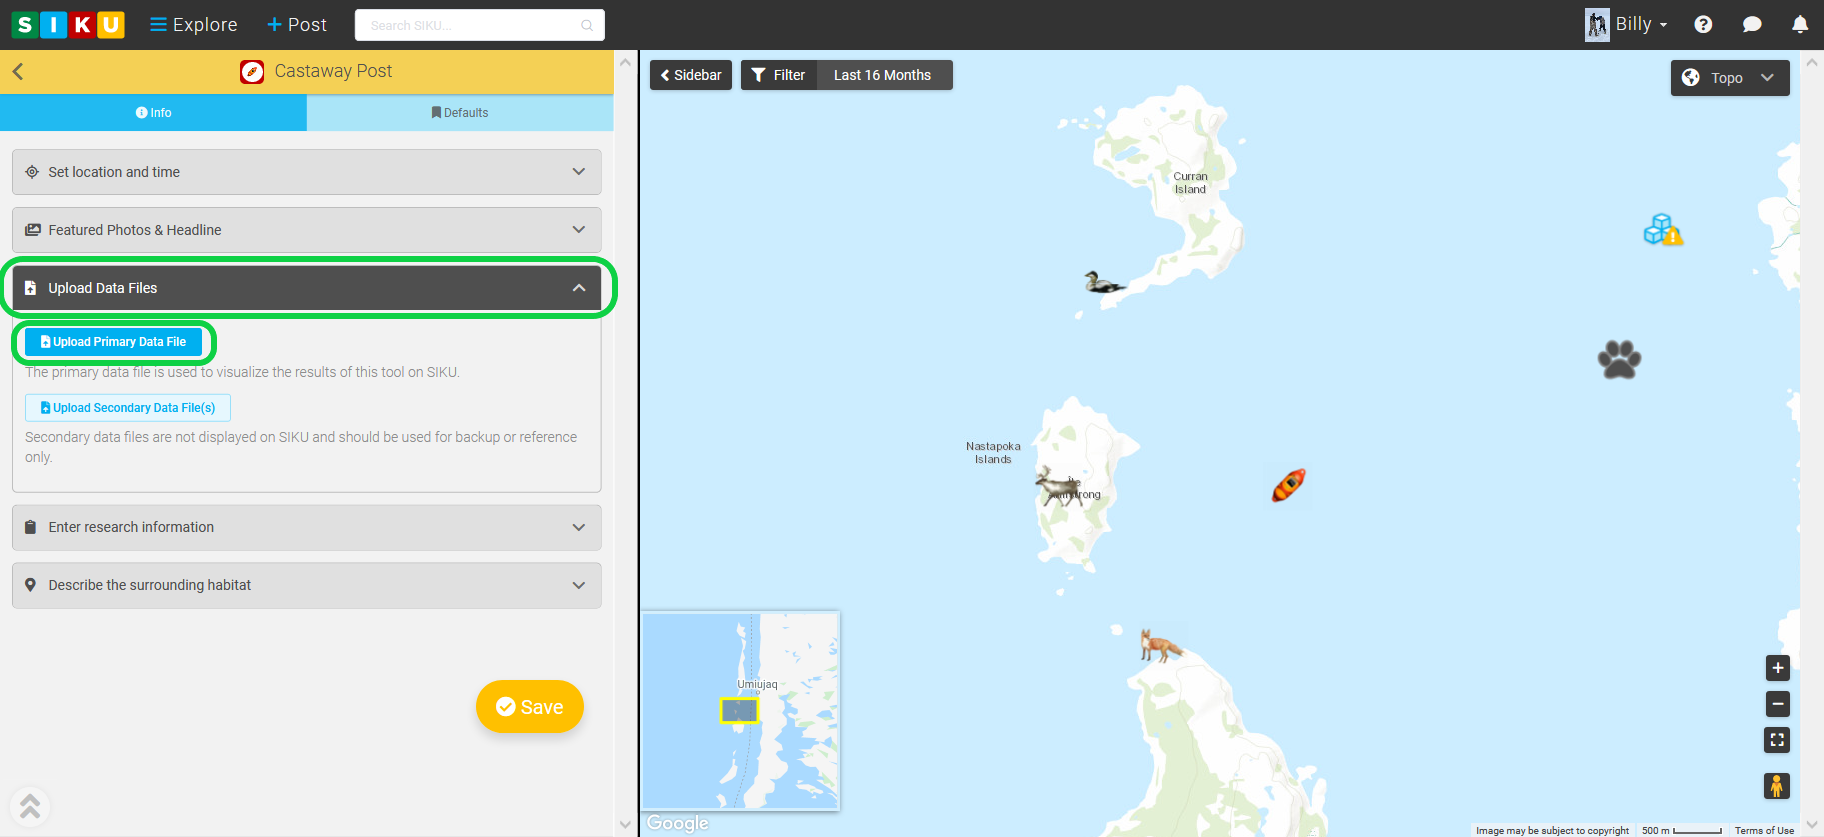
- Select Upload Data Files to open it, then select Upload Primary Data File.
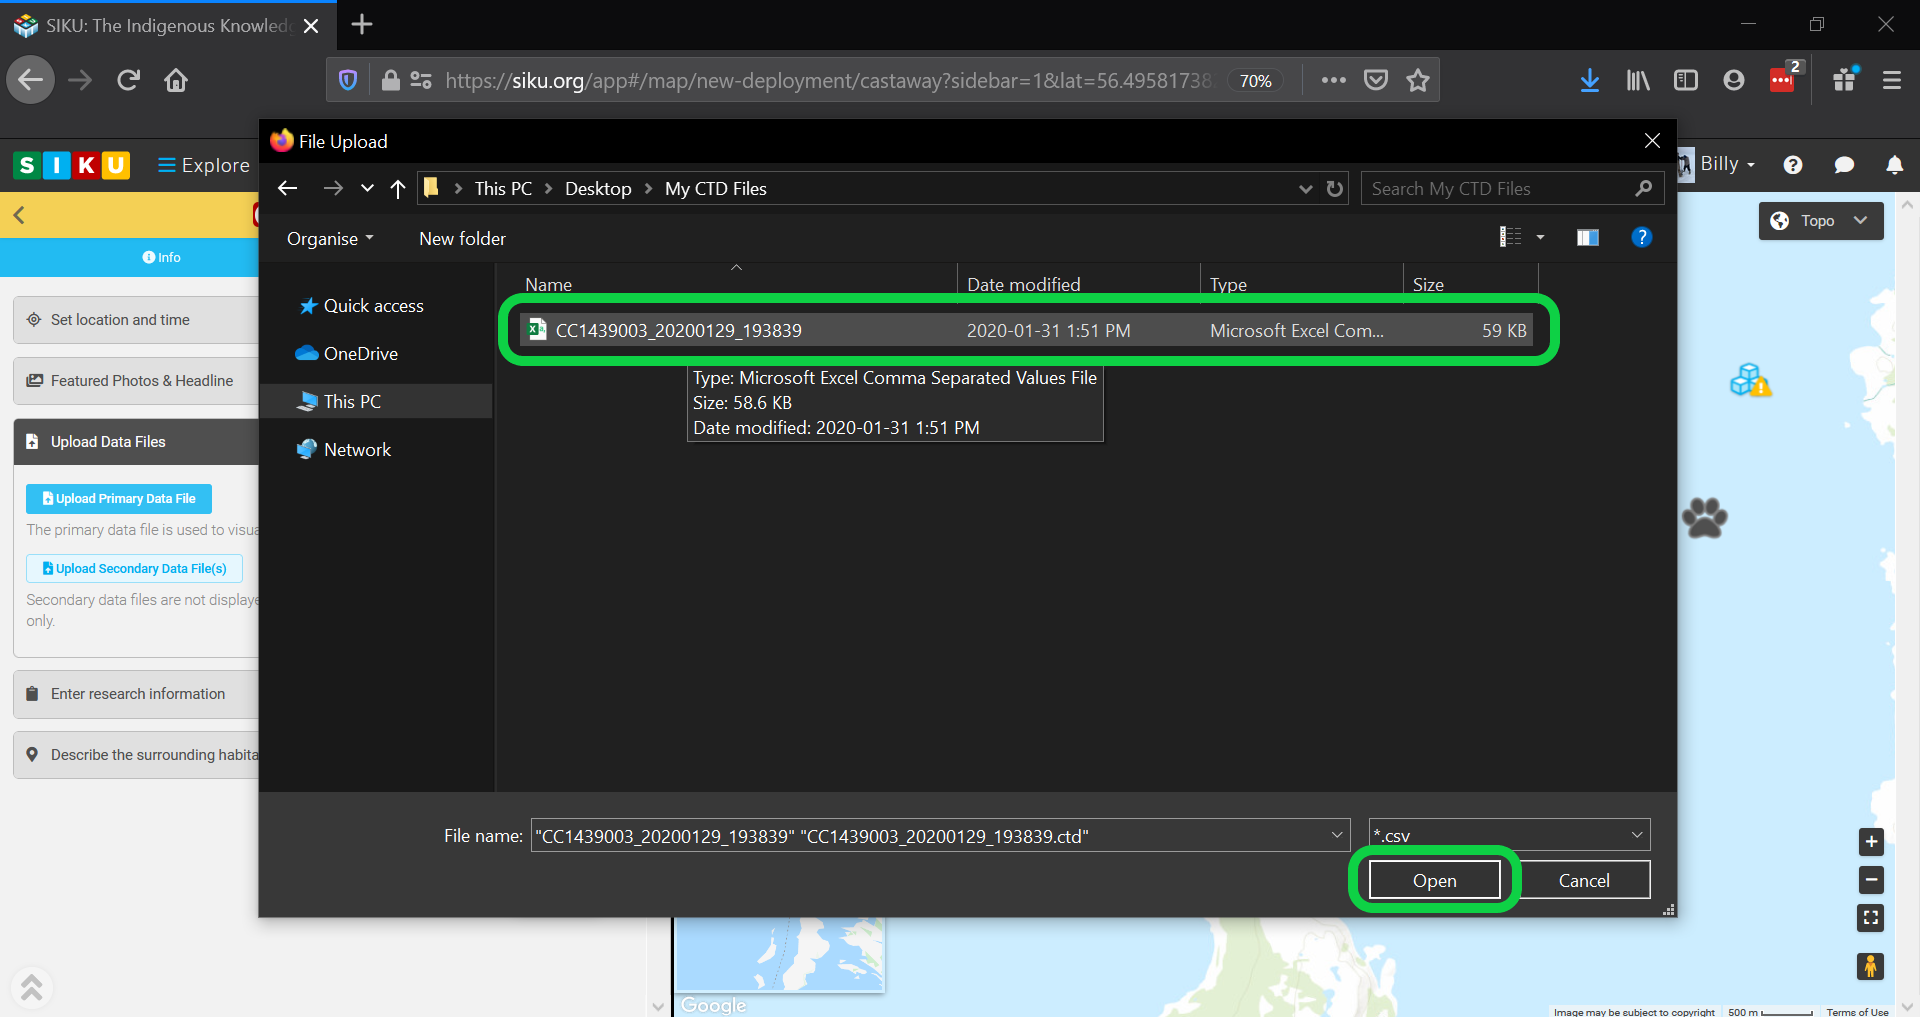
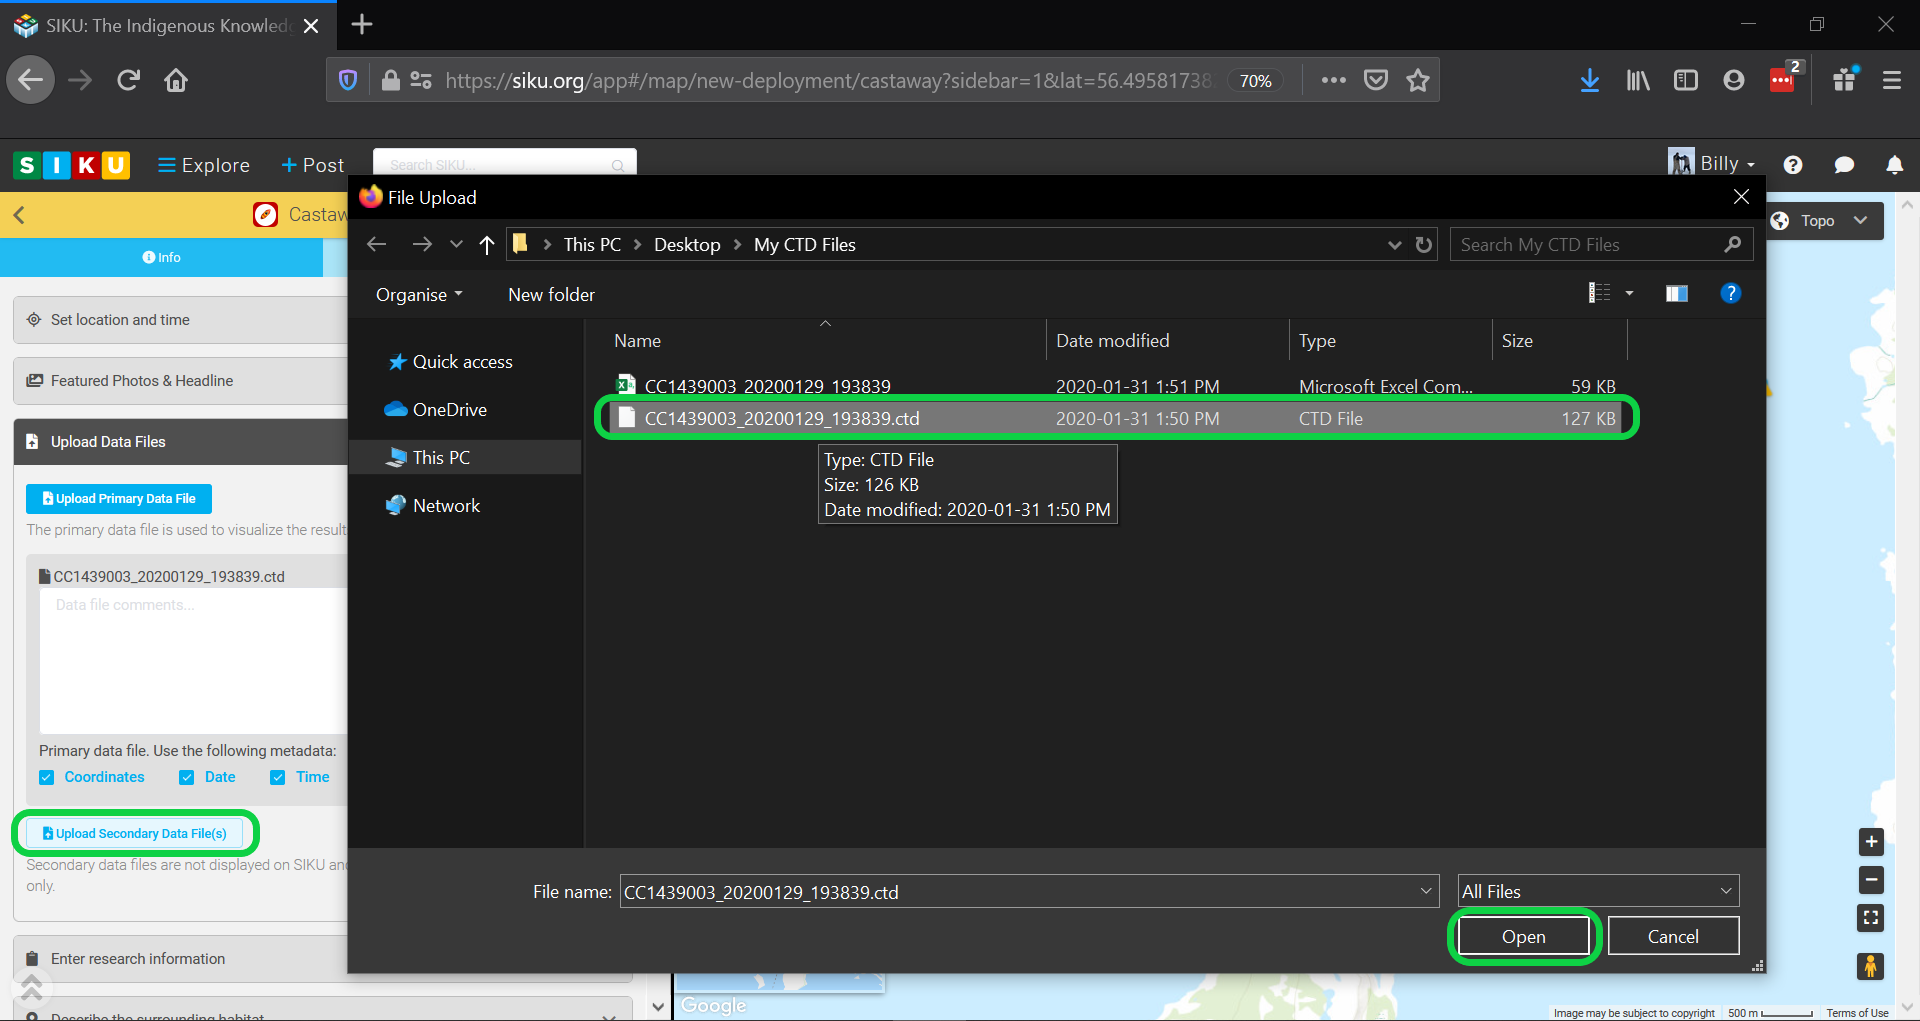
- Find the files that you exported from the Castaway-CTD program. Select the .CSV file and click Open.
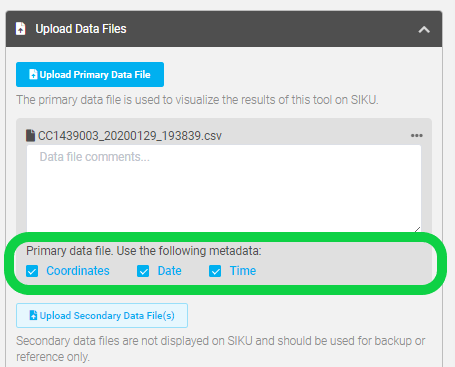
- Select the checkboxes next to coordinates, date and time if you would like the post to be adjusted to show the exact location and time of the cast.
- Select Upload Secondary Data File(s). This time, choose the .ctd file and click Open.
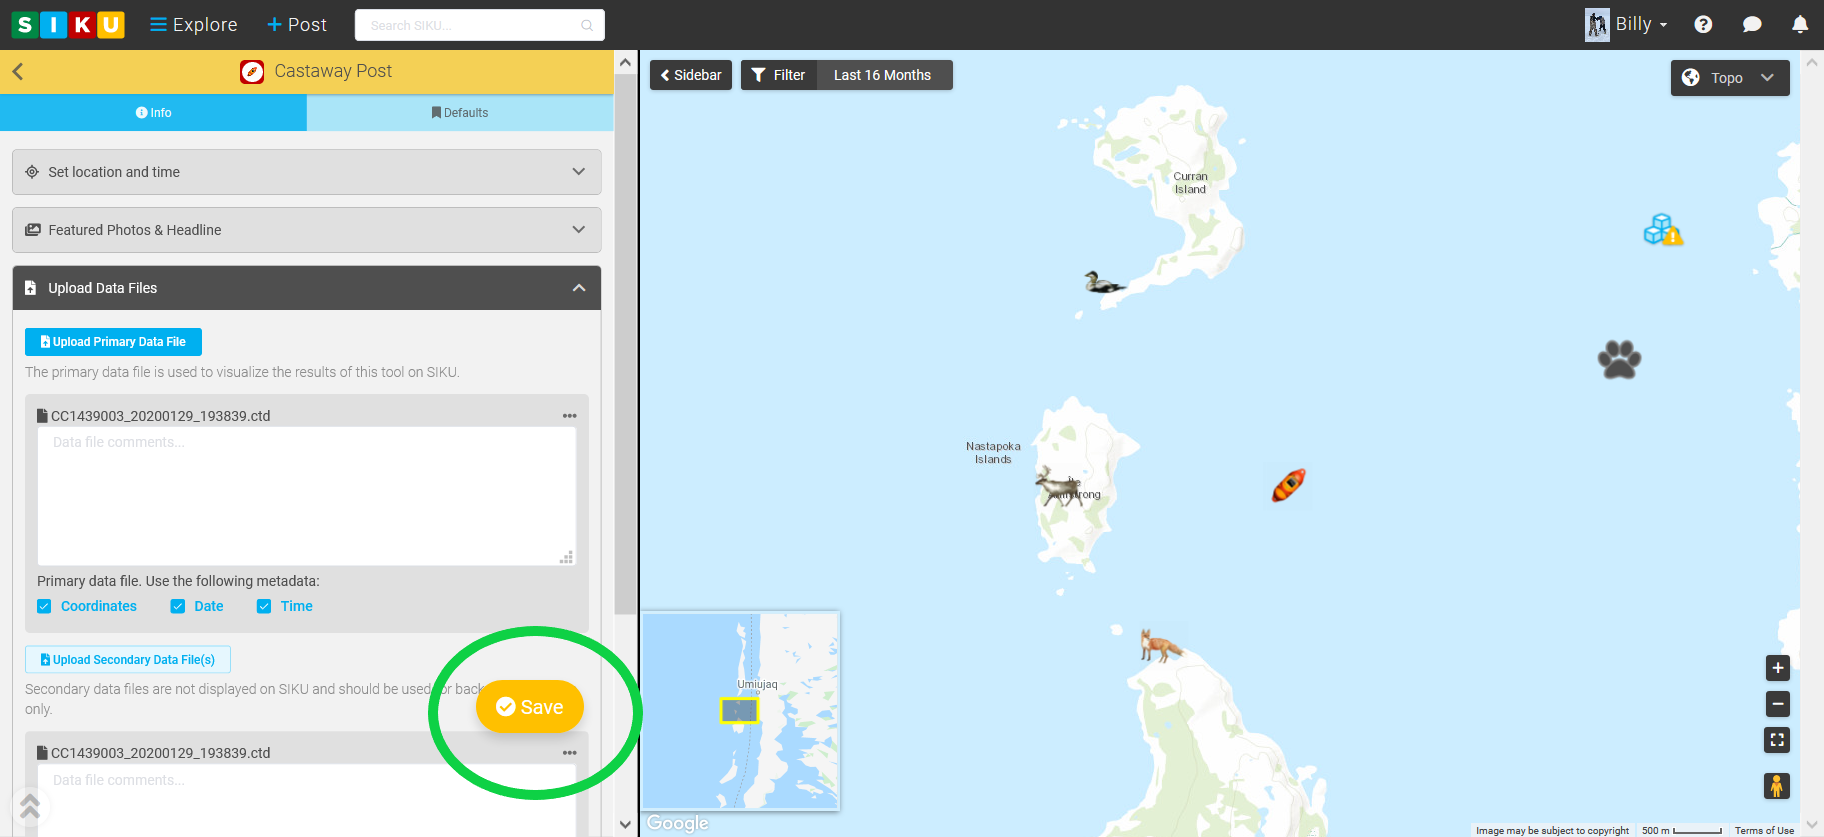
- Select the yellow Save button.
The post is now complete! Your post should now show graphs displaying the data from the CTD Castaway post when you view its details.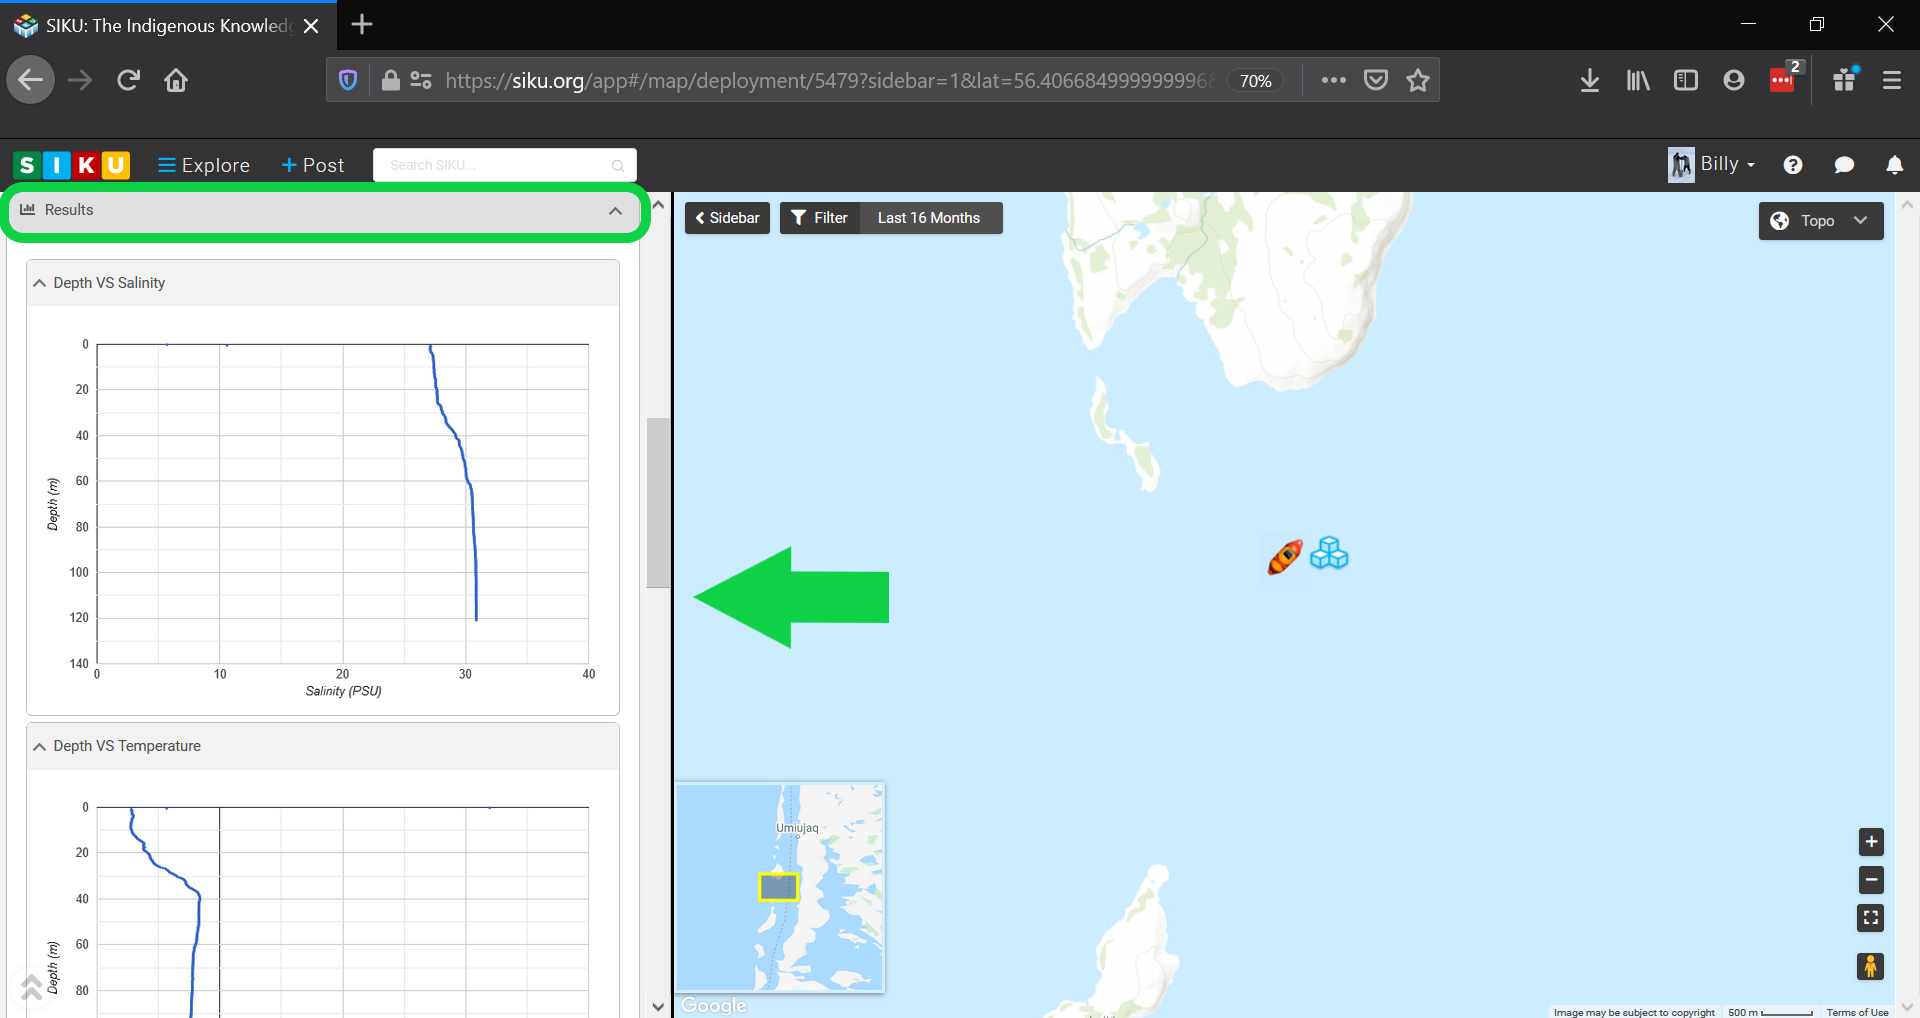

.svg)